Features
High Quality Theme
It contains high quality layout options.You can vary easily customized it according to your needs.
Full Responsive
All forms are responsive.All forms are easily adaptable to any device screen size like mobile phone and tablets.
Clean Modern Code
It uses PHP and HTML techniques.User can easily understand it with basic knowledge of PHP and HTML.
Login Form
It Provides traditional login form, also provides social media login with Facebook,Twitter and Google+.
Forgot Password
It will send an email with reset password link on email address that is entered by user.
Inside Pack
High Quality Theme Options
- Theme used in this package is made with highly qualified features like css3 and bootsrap.
Full Responsive
- It provides responsive layout.
- Content should be positioned automatically according to device size.
- It can be display in well manner in any device like mobile and tablets.
Retina Display Ready
- Everything is made with coding.
- No direct Images are used.
- All forms display very beautifully with high display quality.
Clean Modern Code
- Forms are made using HTML and PHP Scripts.
- Both HTML and PHP syntax are easily understandable.
- User can customize it with basic knowledge of HTML And PHP.
- We uses Webservicse, which uses oop concepts, for perform different operations like insert,update or delete to mysql database.
Style switcher Option
Style Switcher Bar
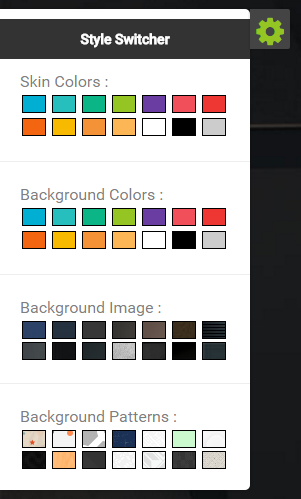
- It Provides 14 pre-defined colors skins.
- 14 pre-defined background colors.
- 14 Images for background.
- 14 Patterns for background.
- This option is available on each and every page, So you can easily determine how page looks in different style.
CSS 3 & Bootstrap
- It uses CSS3 technique to design it's layout.
- With CSS3, we can display every element with different style options.
- Bootstrap is known for it's grid lay out system.
- Bootstrap is very easy to understand, It provides responsive layout.
- So with CSS3 and Bootstrap, we can create effective and Beautifull themes and layouts very easily.
HTML 5
- If you are passionate about simple, elegant, easy to read code then HTML5 is the best for you. HTML5 allows you to write clear and descriptive code.
- New form elements like number, date, time, calender, and range are also added in HTML5.
- It also supports Audio and Video display in web pages.
- HTML5 is becoming a new standard in IT world.
- HTML5 is faster and cheaper, also provides modern techniques for creating webpages.
- HTML5 lets you do things previously impossible with HTML.
Ajax Support
- AJAX is a technique for creating fast and dynamic web pages.
- AJAX allows web pages to be updated asynchronously, which means ajax allows us to refresh some portion of webpage should be updated not whole webpage.
- Other pages, which do not use ajax will refreshing whole page will reloaded every time.
- In this package almost all forms are submitted with ajax.
Validations
- All forms contains validations made up using jquery.
- It Provides inline validations.
- Form does not submit until all validations returns true.
- It is very easy to understand, user can easily add new validations or remove existing validations.
- All forms are created with all possible validations.
SMTP Support
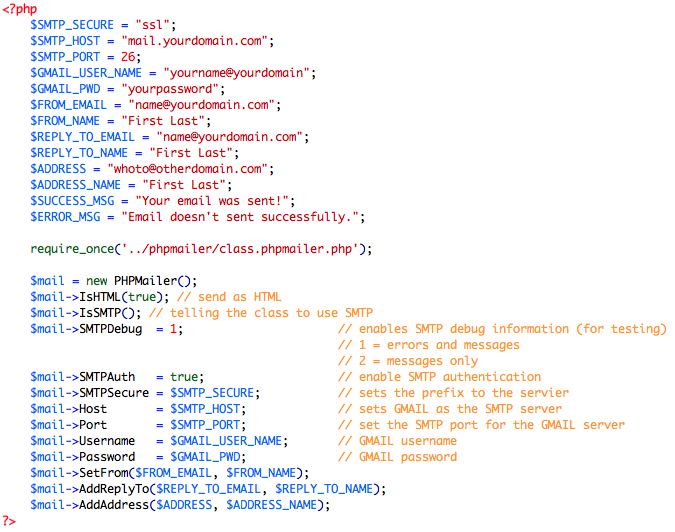
PHP Mailer Email Configurations
- SMTP Provides High authentication while sending mail using php mailer.
- For use SMTP, you have to do following changes as shown in image.
- First of all you have to create your account with SMTP.
- To use SMTP authentication you have to enable $mail->SMTPAuth = TRUE, Otherwise it doesn't apply any authentication.
- After that you have to set SMTP Server by providing host details.
- You must have to set the port number for sending an email.
- Then, you have to write your active SMTP account user name and Password.
- With this configuration you can easily use smtp service.
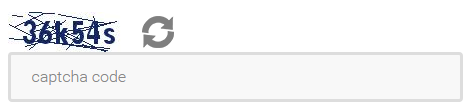
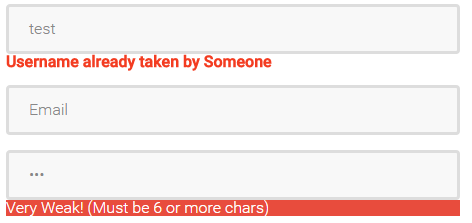
Human verification
- Captcha code is available on sign-up form.
- Captcha is auto-generated text.
- User can refresh captcha code, if it is invisible.
- Form does not submitted until user write correct captcha code.
Captcha Code in Sign-Up Form
Multi-language Support
Footer bar With Multiple Language Support.

- Here, we provides language translation into 8 predefined languages.
- In this package provides 8 languages : English(default),Hindi,French,German,Danish,Japanese,Italian and Portuguese.
- This feature is available on each and every page, in footer area.
Database Support
- Here User's information will be stored into database on successful form submission.
- For this you have to create database first into the phpmyadmin.
- sql file of database available into the database folder, you have just import it.
Use Following steps to create database in phpmyadmin.
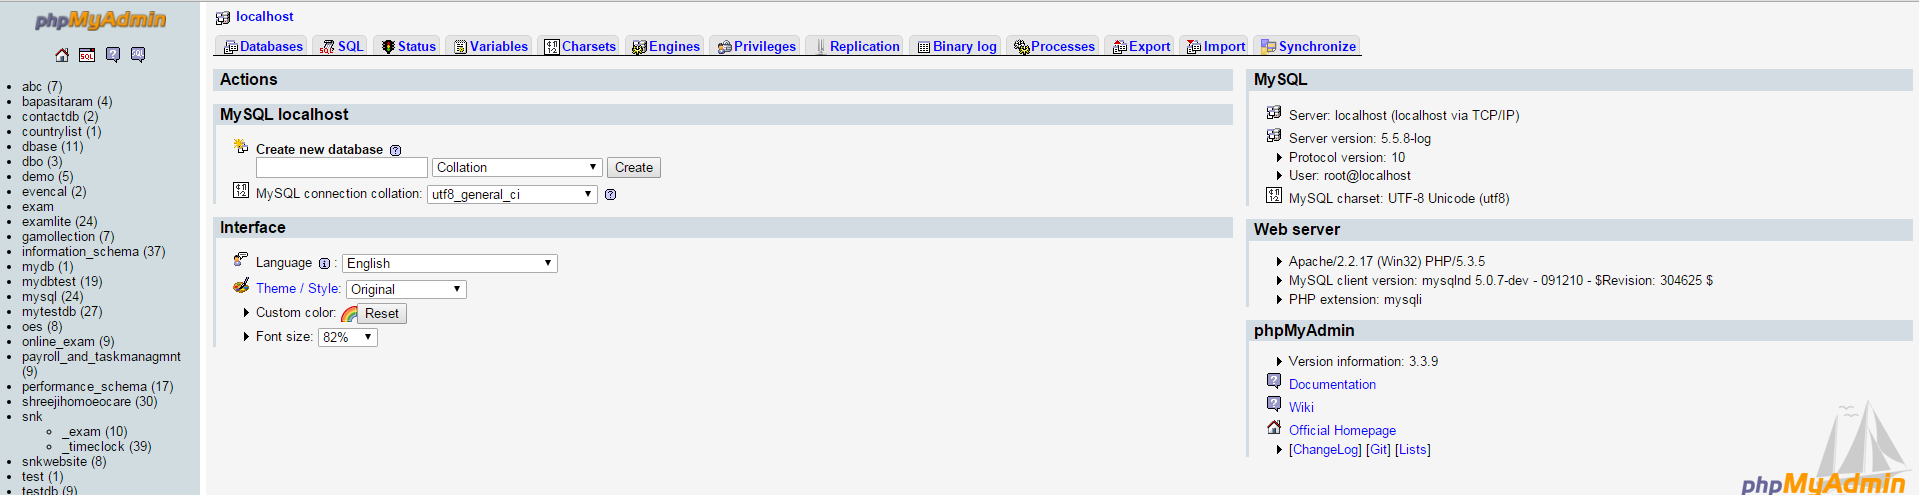
- Log into cPanel or if using wamp open localhost
- Open phpMyAdmin by clicking the phpMyAdmin ink or Icon.
- Following screen will appear when you click phpmyadmin.
- Select the database in the left menu that you will be working with or create new database.
- Click Import in the top menu
- Under File to Import, click Browse and select the backup file you previously created (it will be either a .sql .zip or .tar.gz file).
- Click Go at the bottom right
- When the database has been imported successfully, you should see a message at the top of the page similar to: Import has been successfully finished, ## queries executed.
- After Successful database creation you have to configure config file reside into the php folder.
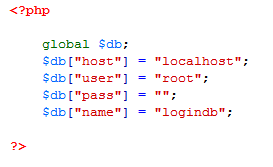
- this file looks like following,
- Here $db is global database array
- In this function first value $db["host"] value should be "lacalhost", if your database is on client machine(on local pc), or it should be domain name if it is on the server.
- Second value $db["user"] value should be username, it should be "root" if you working at localhost.
- Third value $db["password"] is used for password, if you have apply password protection to database, you have to write it into this.It can be blank.
- Fourth value $db["name"] containes mysql database name, which is used in our project
- If connection does not made it will generate an error message.
- If no error message is displayed then your connection is made successfully.
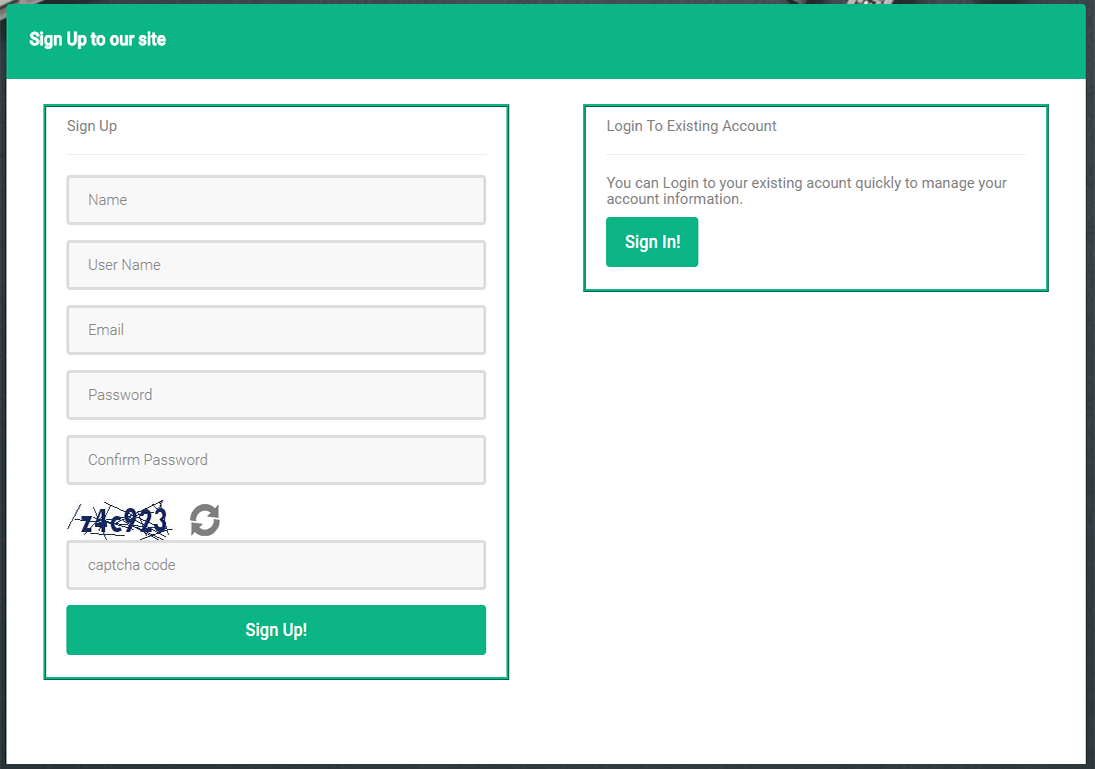
Sign Up or Registration Form
Sign-Up Form
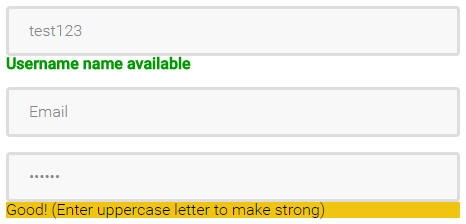
Live User Name availibility and password strengthbar validator
validations
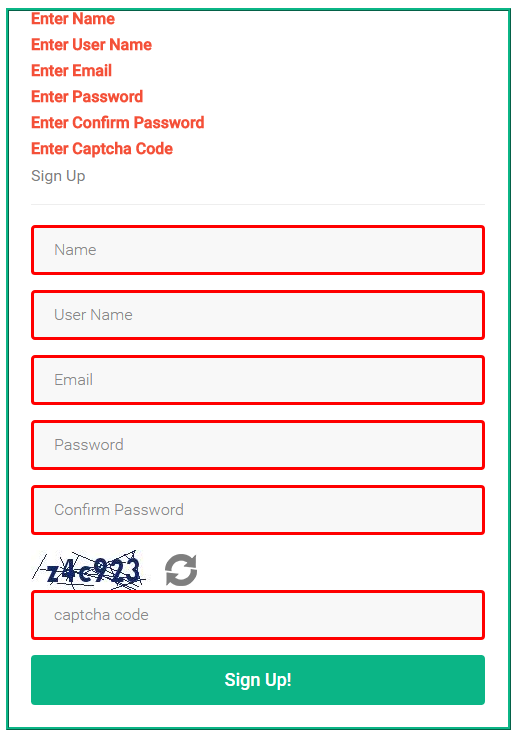
- This is the user registeration or sign up form.
- It allows user to create account with particular project or website.
- Here, an entered email is checked with another emails stored into the database, if it is already exist into database or used by another user then it will generate an error message.
- Here, unique constraint is apply to email and username field.
- It stores form data into mysql database.
- Once user sign up successfully then they can login into their account at any time and manage their own stuff.
- User name availability feature is also apply here, it display inline status of availability of user name.
- It also containes password strength bar.
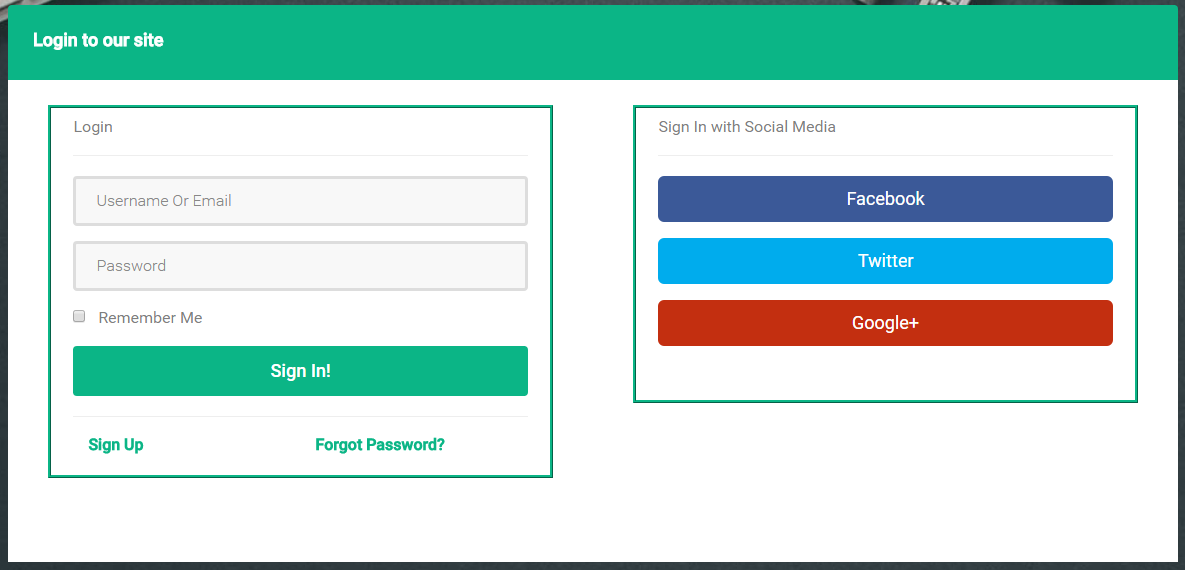
Sign In or Login Form
Login Form
validations
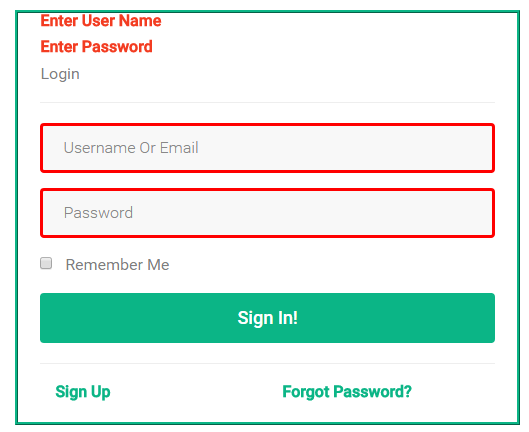
- Login form allows user to login into their account.
- It also provides additional login with social media like Facebook,Twitter and Google+.
- It also provides user name and password remember funtionality,which means next time when user open login page it wiil automatically fills user name or email and password.
- Here, user can use both user name or email id for login.
Login With Facebook : Settings
- This will allows user to login with their Facebook account to particular site.
- For this, You have to create your Facebook App.
- Use Following steps to create Facebook App.
- Go to the https://developers.facebook.com/apps/ and login at your Facebook developer account.
- Create a new Facebook apps with your desired name like Web Login.
- If you want to test Facebook login at the localhost server, then your App Domains should be localhost. Also localhost domain will only work, once you add platform.
- For add a platform click on Settings link from the left menu section at the apps page => click on the Add Platform button => choose Website category => enter site URL (http://Website Url/login-forms/).
- Once you completed the above steps, your apps settings page would be displayed like the below screenshot.
- Now click on Status & Review link from the left menu section and make your apps as live. Contact email is required for enable the apps live option. If you have not add apps contact email earlier, go to the settings page and add email. Once you submit the contact email, you would be able to enable the apps live option.
- Congratulation! your apps creation has completed.
Facebook App Creation
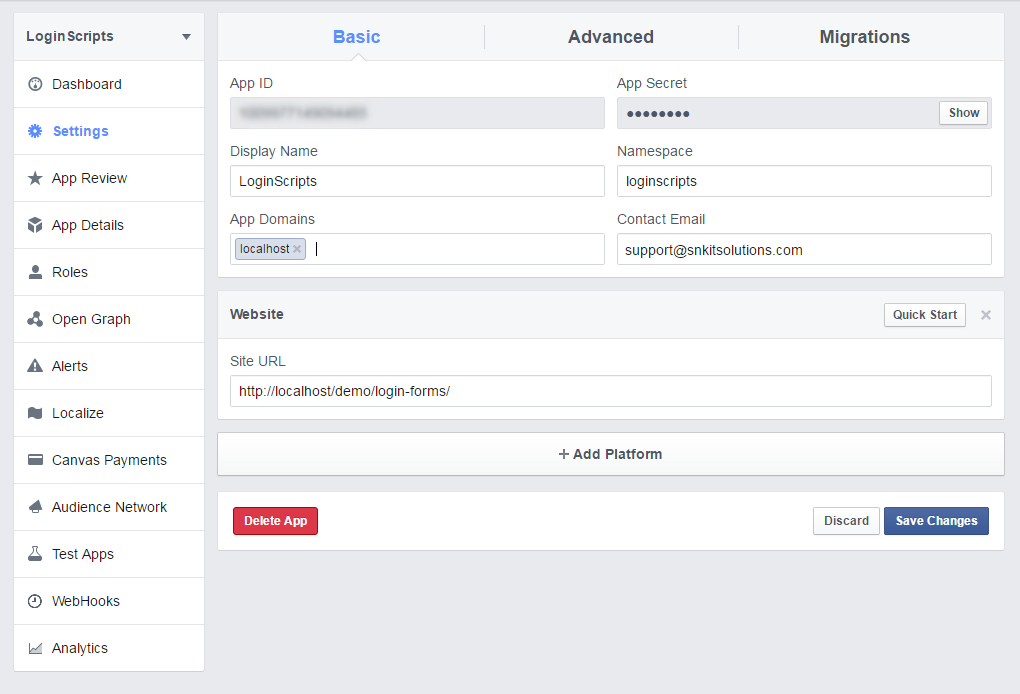
Facebook API configuration
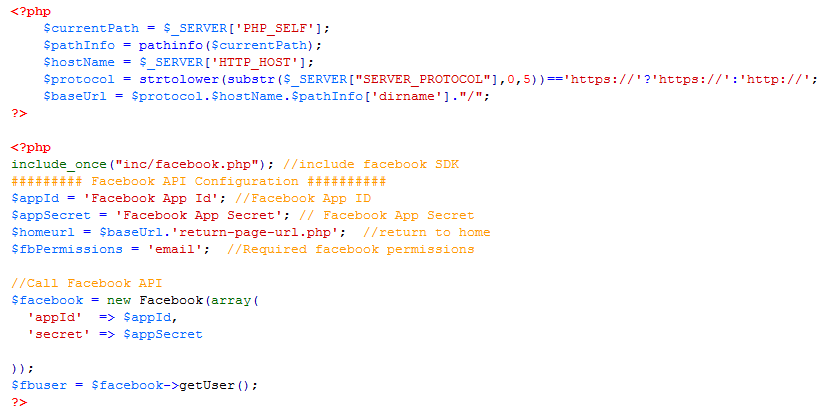
- Now, open the fb-config.php(login-forms/facebook-login/fb-config.php) file and modify the $appId, $appSecret and $homeurl variables , return-page-url value as shown in above image.
- Note: You can find the App ID and App Secret from your Facebook Apps settings page.
Login With Twitter : Settings
- This will allows user to login with their Twitter account to particular site.
- At first go to the https://apps.twitter.com/app/new and login at your Twitter developer account.
Create new apps with the following details.
- Name: Your application Name. This is shown to the user while authorizing.
- Description: Your application Description. This is shown to user while authorizing.
- Website: Your application website.
- Callback URL(*): After authorization, this URL is called with oauth_token.
Now change the apps permission to Read and Write or Read, Write and Access direct messages. For change the apps permission, you need to add mobile number to your twitter account. If you are not able to add mobile number from the web, then please follow the below steps.
- In order to use this process, you need to have a smart phone and install the Twitter mobile application. By this process you will be able to switch to Twitter application write access, although the Twitter websites doesn’t accept your phone number.
- After installing the Twitter mobile application, go to the tab on the right, it’s the screen showing your user details. Hit the wheel (it’s shown under the amount of tweets) and click Settings.
- After clicking on Settings, another view opens where you have to click on your account.
- The following view shows the options for your Account – scroll all the way down and click Security.
- After hitting the Security option, the application will ask you to add a phone.
- After clicking Add phone, the mobile browser will open and require you to insert your phone number.
- After adding the phone number and pressing save, wait a few minutes. Twitter will send you a link to the phone number you just added to verify it. After clicking the link in the SMS the phone number is approved and you should be able to switch the application access to write.
- After the apps creation you have to click on Test OAuth. Also you should login with your twitter account for test OAuth. After that you would be redirected to the OAuth Settings page. At the OAuth Settings page you can see the Consumer key and Consumer secret.
- Congratulation! your apps creation has completed.
Twitter App Creation : OAuth Settings
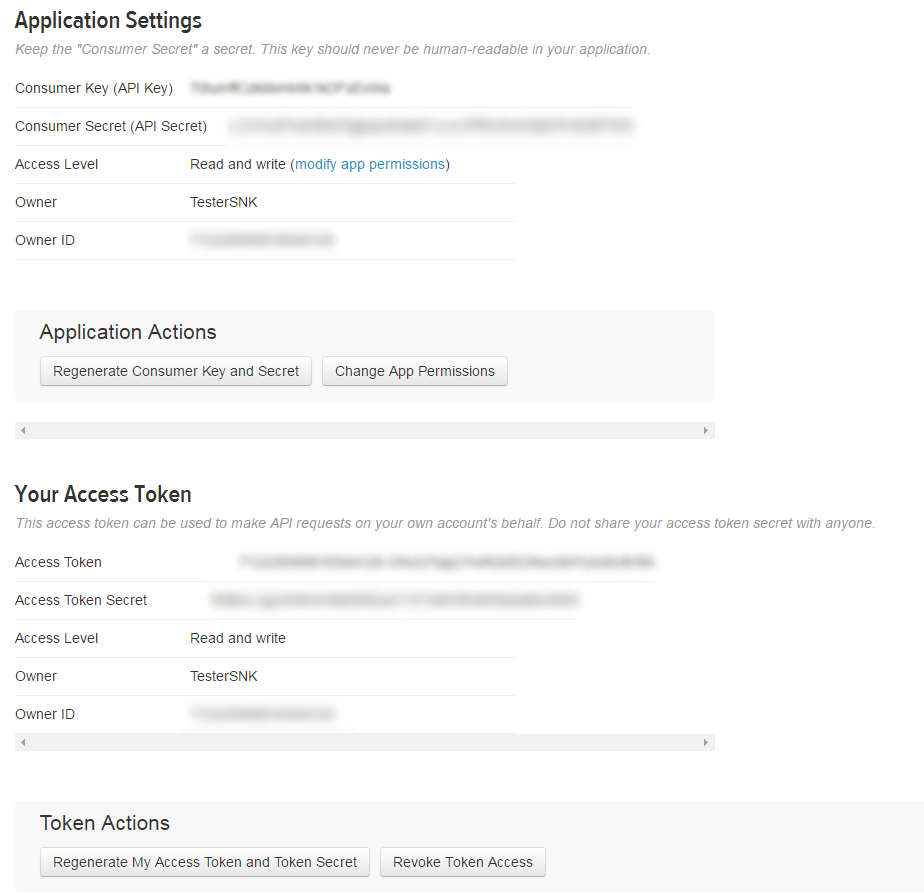
Twitter API configuration
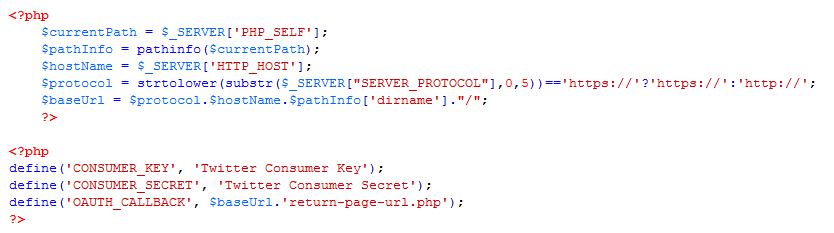
- Now, open the twitter-config.php(login-forms/twitter-login/twitter-config.php) file and modify the CONSUMER_KEY, CONSUMER_SECRET and OAUTH_CALLBACK constants value, as shown in above image.
- Note: You can find the CONSUMER_KEY and CONSUMER_SECRET at the app page.(Go to the https://apps.twitter.com => click on your app => click on the API Keys tab => copy the API key and API secret => replace CONSUMER_KEY value with API key and CONSUMER_SECRET value with API secret)
Login With Google+ : Settings
- This will allows user to login with their Google account to particular site.
- For this, You have to create your Google Project.
- Use Following steps to Google Project Creation:.
- Go to the Google Developers Console – https://console.developers.google.com/
- Select an existing project, or create a new project by clicking Create Project:
- In the Project name field, type a name for your new project.
- In the Project ID field, the console has created project ID. Optionally you can type project ID for your project. But project ID must be unique world-wide.
- Click on the Create button and the project to be created within some seconds. Once the project is created successfully, the project name would be appearing at the top of the left sidebar.
- In the left sidebar, select APIs under the APIs & auth section. A list of Google APIs appears.
- Find the Google+ API service and set its status to Enable.
- In the sidebar, select Credentials under the APIs & auth section.
- In the OAuth section of the page, select Create New Client ID.
- Create Client ID dialog box would be appearing for choosing application type.
- In the Application type section of the dialog, select Web application and click on the Configure consent screen button.
- Choose Email address, enter Product name and save the form.
- In the Authorized JavaScript origins field, enter your app origin. If you want to allow your app to run on different protocols, domains, or subdomains, then you can enter multiple origins.
- In the Authorized redirect URI field, enter the redirect URL.
- Click on Create Client ID.
- Now you can see the Client ID for web application section. Note the Client ID and Client secret that will need to use to access the APIs.
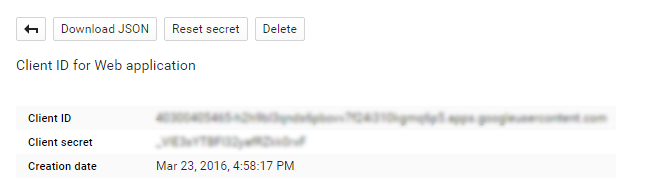
Google API configuration
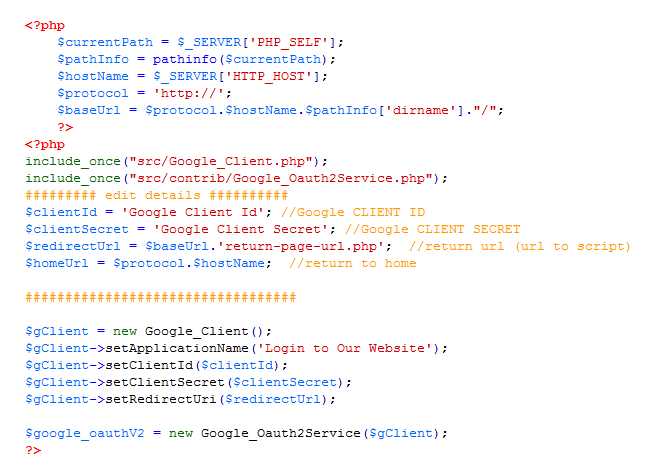
- Now, open the google-config.php(login-forms/google-login/google-config.php)and modify the $clientId, $clientSecret,$redirectUrl, and $homeUrl variables , return-page-url value.
- Note: You can find the $clientId and $clientSecret at the Google project page.(Go to the https://console.developers.google.com/ => click on your project => click on the “APIs & auth” link from the left menu panel => click on the Credentials link from under the APIs & auth menu => copy the Client ID and Client Secret)
Welcome Page
Welcome Page or Home Page

- Home Screen or Page, display after successfull login.
User Profile page
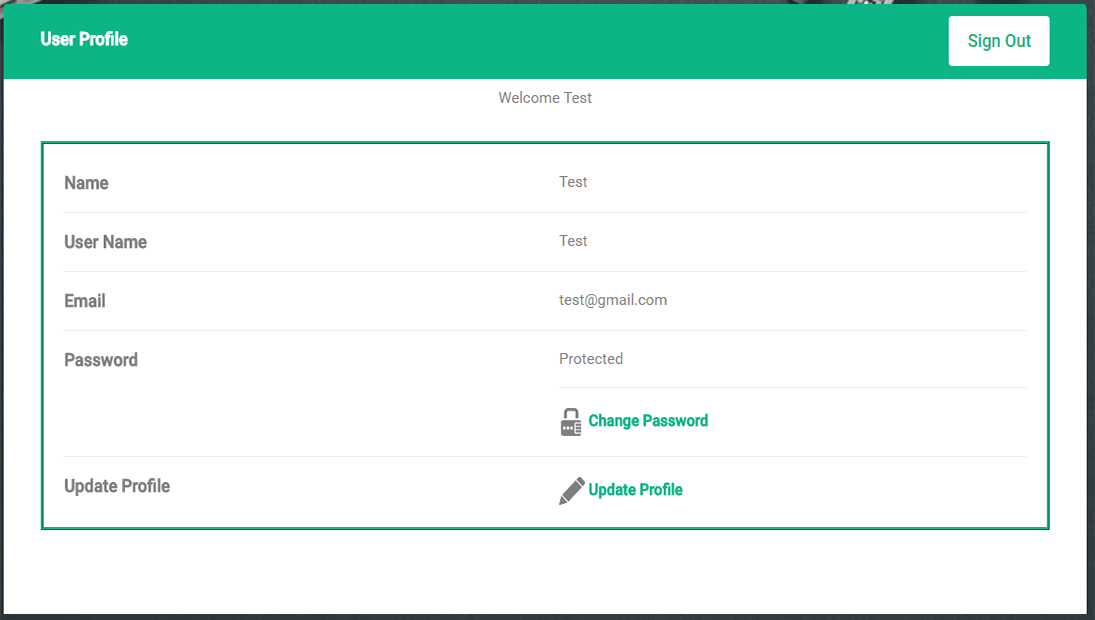
- This Page display user's information from mysql database.
- It provides change password page link and edit profile link.
Edit User Profile page
User Edit Profile Form
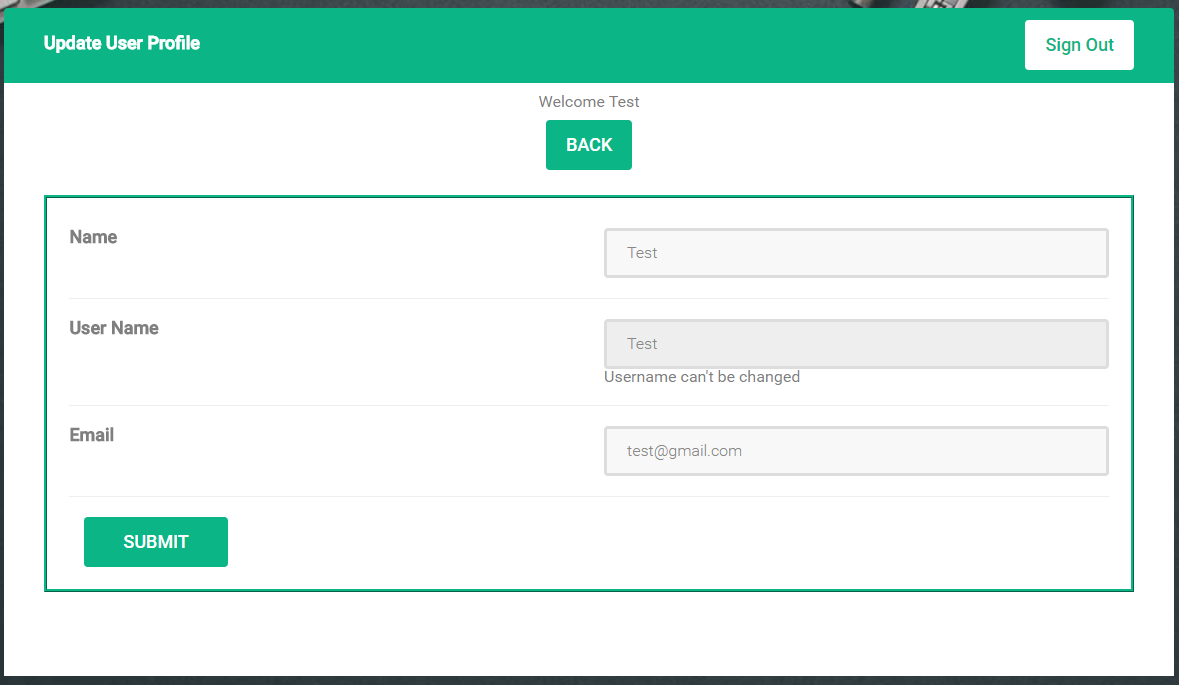
validations

- With this form user can change registered information like email and name.
- It doesn't allow to change user name.
- Here, If user update the email, if it is already exist into database or used by another user then it will generate an error message.
- Here, unique constraint is apply to email field.
Change Password
Change Password Form
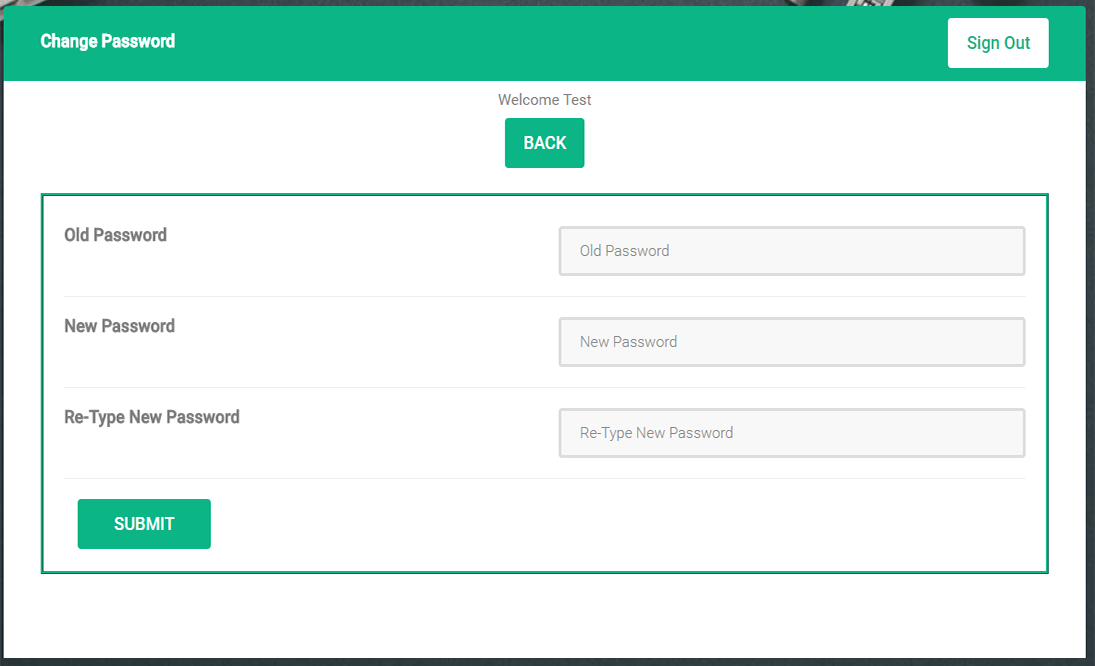
validations

Password Strength bar
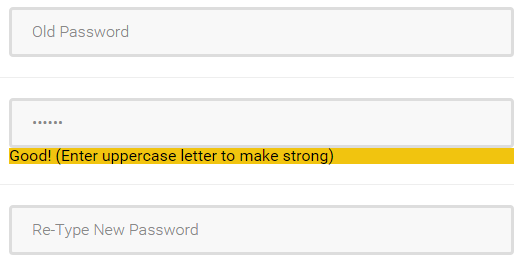
- With this form user can change account password.
- It requires old password to create new pasword.
- All required validations are apply with this form.
- It containes password strength bar.
Forgot Password
Forgot Password Form
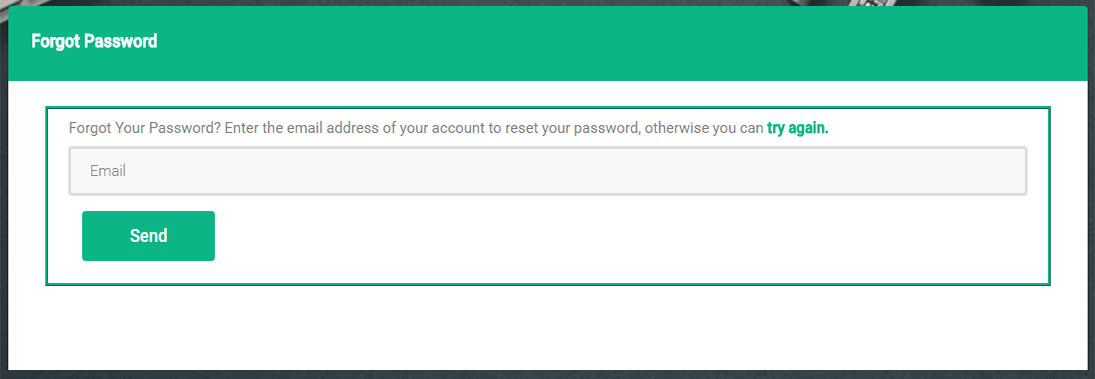
validations
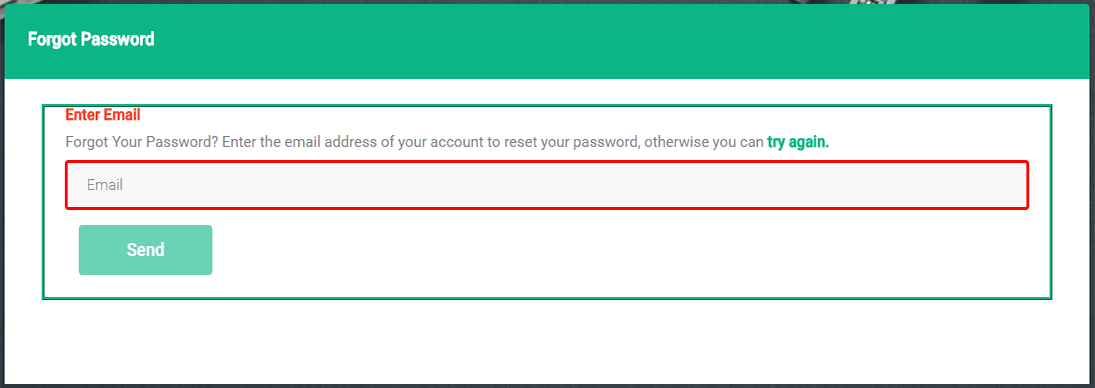
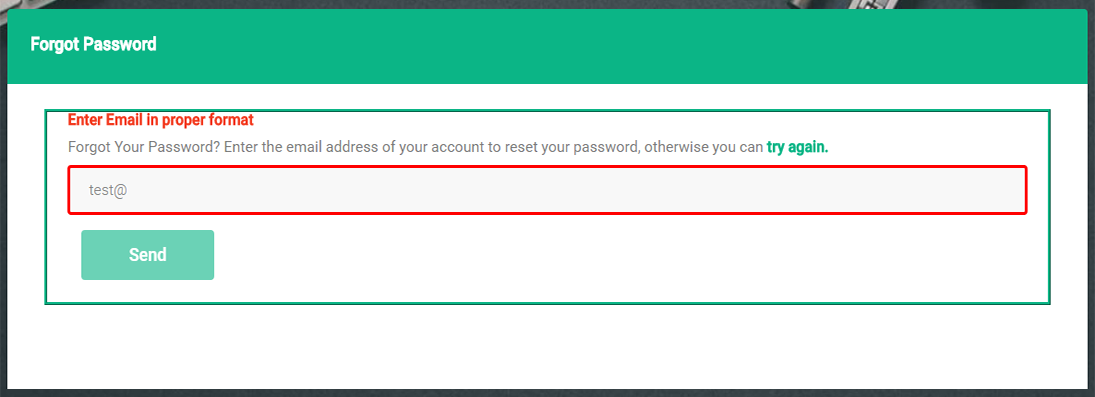
- This form send an email with reset password link to entered(registered) email.
- Here, user have to entered their registred email, otherwise it will gives an error of invalid email.
- You have to change domain name in common.php file for send reset password link to user, as shown in below.

Success Page
Success page
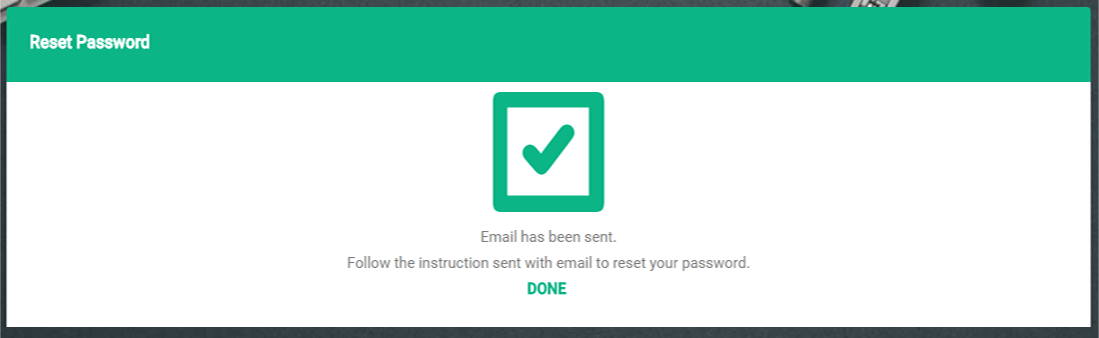
- This Page will appear if reset password email send successfully to recipient.
Reset Password
Password Reset Form
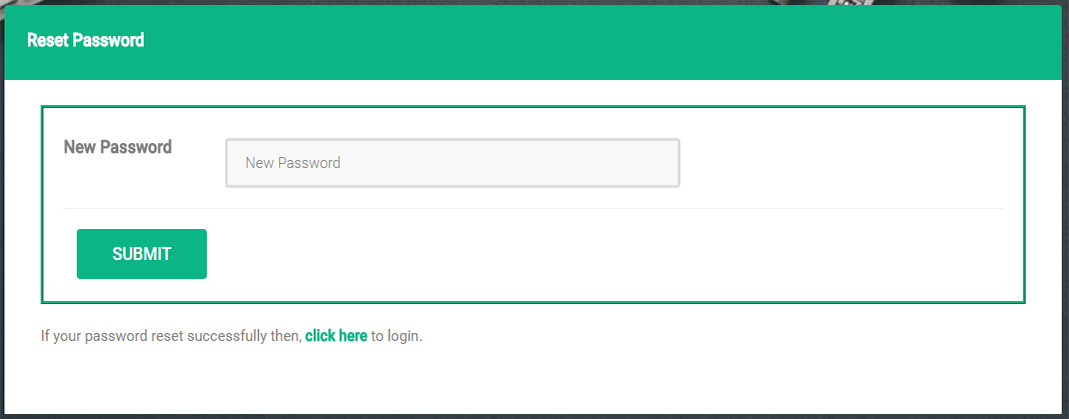
validations

Password Strength bar

- This form allows user to reset or create new password for their account
- Here, password strength bar display when user entered the password.